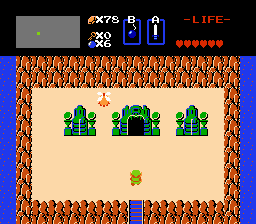
Technically, level four is also exposed. However, to access this screen, you'll have to sail on your raft. The raft can only be launched from docks, of which there are two in the game. The dock is a mere four screens away from the starting screen, so it shouldn't take long to find. Level four's raft requirement also means the game can safely assume a stronger player is entering.
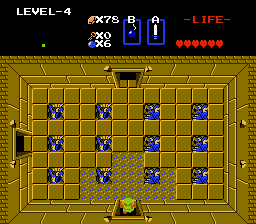
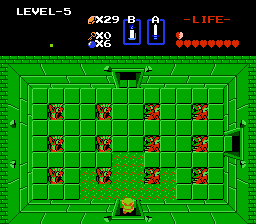
Level 4 - Snake
Back to split paths. The left room contains keese to defeat for a key, which will be required. The next room contains vires, hopping winged creatures which split into keese when if your attack isn't strong enough. However, even the white sword isn't powerful enough so the player will be dealing with lots of keese this level. There's also a locked door to the right which will give the player the compass if they use the key there. The next room contains some keese and a key on the ground.
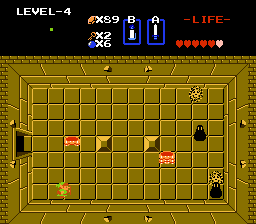
Following that is the game's first dark room. Without a flame to light the room, the player will be stumbling in the dark. Fortunately blue candles can be purchased at shops easily enough.
This is the same room after using the candle. Skilled players can just memorize the layouts of these rooms and continue onward, but even if you're not going crazy looking for secrets, getting the candle is worthwhile. The following room contains zols and another key on the ground, bringing the player's total to three.
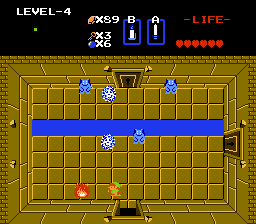
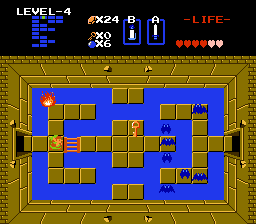
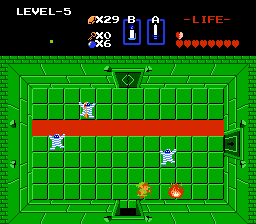
The next room has two locked doors, but what is currently unreachable due to water. Using the first key and moving east leads to another room with vires with a locked door to the north, and a shuttered door to the east. The locked door is actually a trap in that the room it leads to has a large pool of water and the player gains no access to the room's other exits from there, though they can see the dungeon map in the corner teasing them.
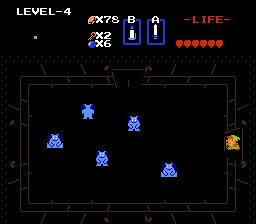
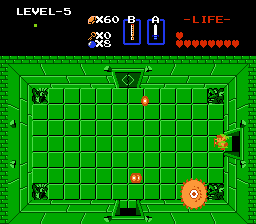
Fighting the vires to gain access to the eastern room leads to a seemingly dead end. The room also introduces Like Likes, enemies which can engulf link and eat his large shield if he has one. Defeating the enemies does nothing! This room has the first mandatory block to push in the game, revealing a set of stairs taking you to the treasure room containing the stepladder.
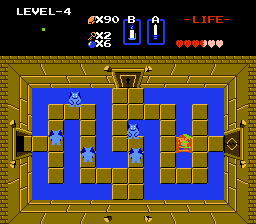
Heading back, the game immediately lets you discover the use of the step ladder, as the previously winding path becomes a straight line to travel. Link can then proceed across the water that blocked him before. The next room connects with the "trap" room from earlier, but this time can obtain the map. Another room locks Link in and forces him to face Manhandla again. Yet again I die because I am bad at this. I buy some bombs for my next attempt, and also arrows since I had the money and would be needing them soon enough anyway.
After a sad amount of more attempts I finally bomb him to death. I also accidentally bombed a secret! It turns out you can bomb walls in this game and find hidden rooms or shortcuts through the dungeons. Who knew?
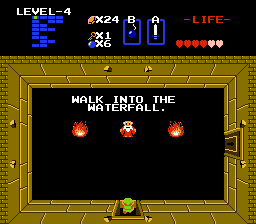
Ignoring the bombed wall, (it was an accident after all!) The next room is the first dungeon advice that hasn't been missed. The waterfall below the location of the white sword can be walked into and contains a woman who offers information for money.
The next room contains a free key on the ground. Interestingly enough, this dungeon has one more door than key. Unfortunately, if you don't enter this dungeon with a spare key from an earlier level, it's possible to actually hit a locked door and not be able to proceed without purchasing a key. I'd say this is bad design here and that the trap room shouldn't have required a key. Keys cost 100 rupees which is a considerable time investment, especially if you aren't finding hidden secrets which give you large quantities at once. Shame on you Zelda, I'm trying to convince people this game isn't full of stupid design decisions here.
Wait a minute, this is slightly more involved than I thought. If like me you accidentally bombed the wall while fighting Manhandla, you'd discover a secret path. Another bomb to the north would let you pick up this key and open the door to the advice room from the other side. It's still possible to run out of keys early on, but this way would let you only have to purchase one key, and not two, while also demonstrating the concept of secret passages.
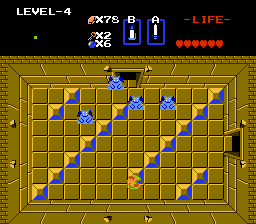
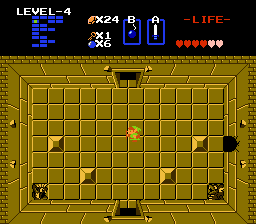
Afterwards, it's a continuous path to the boss. This room requires a block to be pushed, and thus defeating the vires.
The boss of level four is Gleeok, a multiheaded dragon. I manage to beat him significantly more easily than Manhandla.
== LEVEL 4 TOTALS ==
Bushes Burned: 0
Walls Bombed: 0
Blocks Pushed: 2(+2)
Rooms Cleared: 14(+6)
== MISSED ITEMS ==
Compass - Lying in the open behind a locked door
== MISSED CLUES ==
None!
I purposely avoided picking up that last key the dungeon gave me, as it's easier to track keys in dungeons if I'm entering them with none to begin with.
With the raft and stepladder, now's a good time to pick up a few things on the overworld that I'm allowed to get. There are two items on the eastern coast to acquire before heading to level five, though both are optional. The first is the other location where the raft can be used.
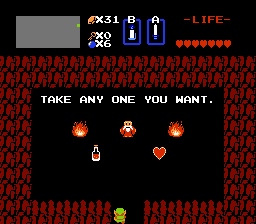
It leads to a structure with this old man inside. Obviously take the heart container. You can buy potions, even in this playthrough.
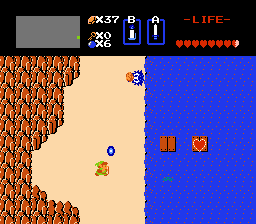
Just a few screens south is this wrecked pier which can be crossed using the stepladder to get another heart container. In total there are five of these on the overworld, but the other three all require revealing secrets.
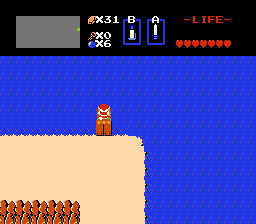
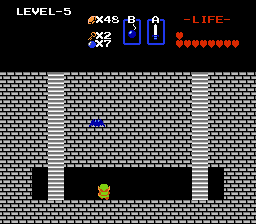
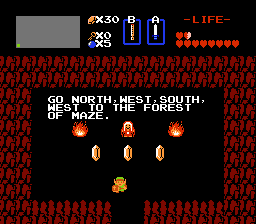
But wait! Where is level five? This screen is suspicious enough, if you go north, south, or east, the screen loops and you remain on the screen. Going west puts you at the waterfall below the white sword location. After picking up half of the triforce pieces, we finally have a legitimate roadblock for a new player...
...Except level four pointed you exactly where you need to go.
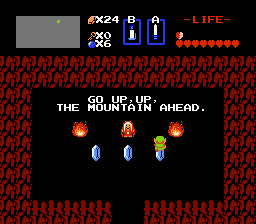
"Walk into the waterfall."
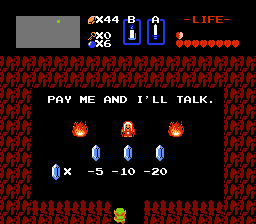
Sure enough, you can bribe this woman to get some information. The first two choices merely say that's not enough money for her, but 20 rupees will reveal the secret of the mountain to you.
Sure enough, walking up (albeit, four times, not two) plays the secret jingle and brings you to level five.
Think about the thought put into the placement of these four screens.
You have the top of the waterfall which contains the white sword. Level three has a message telling you to go here if you haven't for a sword. Level four tells you about the waterfall. The next screen not only loops, but does so in such a way that it cuts off this section of the world from the eastern side (You can travel to this screen _from_ the east, but never _to_ the east).
The player is routinely asked to visit this area, and if they were still carrying the wooden sword by this point, they're significantly more likely to pick up the white sword now as it's so close. Even if the player took an unconventional route and played levels three and four first, they're now capable of getting the white sword and completing level five as well while they're here.
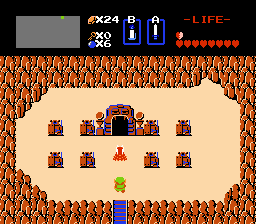
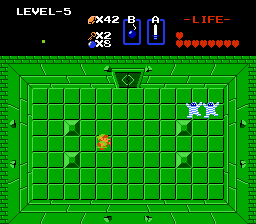
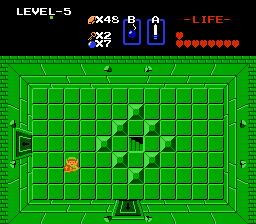
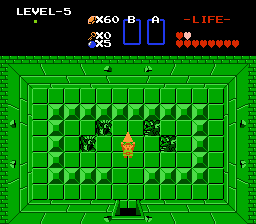
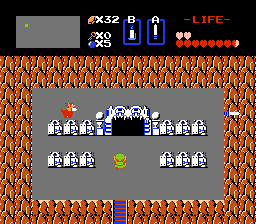
Level 5 - Lizard
This dungeon has 7 keys and 6 locked doors. Two paths from the start. The eastern one leads to a room with a new enemy, Pol's Voice, which has a lot of health, but can easily be defeated with arrows if you've purchased them by now (and found the bow back in level one).
The northern room introduces another new enemy, gibdo. They move slowly, have no projectiles, and won't be a problem for Link. However they take four hits with the white sword to kill, and a whopping seven with the wooden sword. Perhaps this is meant to really hammer it in to the player that they shouldn't have the wooden sword still? In fact, if you have beaten the first four levels, and acquired all five overworld heart containers, it's possible to have the magical sword for this dungeon and defeat them in two hits.
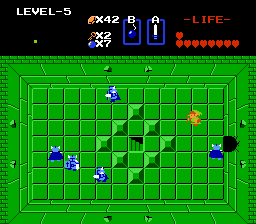
All of them have to be defeated here to proceed into a room with three dodongos. There's a locked door here that will take you to the map room, but it can be skipped. To the right is an open door which follows the main path of the dungeon, but there's no reason to continue on that path just yet, as the boss requires an item acquired elsewhere.
Instead, all the dodongos have to be defeated, which will take 3-6 bombs depending on how they're killed. Otherwise a secret passage needs to be used. Fortunately, defeating the dodongos causes more bombs to drop.
The next room contains a few zols that when defeated give you a key. Worth noting is there are lava flows to cross with the stepladder in this room as well, cutting off the dungeon's main path unless you have the stepladder, preventing you from beating level five before four and three.
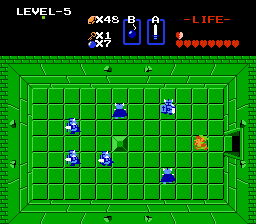
Entering this room locks you in, and even defeating the enemies won't open the door. One of the gibdo has bombs which are visible like the stalfos in level one with a key. Here there's some mandatory bomb usage. You;ll need to bomb left to proceed towards this dungeon's item, and also to the right to escape back to the first gibdo room. Theoretically, you can use all your bombs in this room and trap yourself, forcing you to restart.
The mandatory secret features blue darknuts, faster and stronger than the red ones seen in level three. They can be extremely difficult for new players to deal with. They also take off two hearts per hit. A player who hasn't found any hidden heart containers (and also hasn't found the blue ring) will die in 4 hits from full health.
But even when they're defeated, the player doesn't get treasure. Now the dungeons are becoming more complex, and are split into different areas only accessible via stairs.
The next room has two locked doors. The wrong door gives you another key on the ground however. It also holds the first optional bomb upgrade to increase how many you can hold, provided you bomb into the secret room.
The correct door contains even more blue darknuts which have to be defeated before a block can be pushed to take you to the dungeon's treasure room. I wound up dying to them multiple times, spoiled by always having a blue ring by this point which halves damage. I wound up buying a potion, which of course meant on the third attempt that I didn't take a single hit in either of the blue darknut rooms.
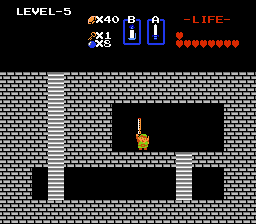
This dungeon's treasure is the recorder. A magic instrument that has three different uses in the game which will be seen shortly. With it, I can get back on the main path of the dungeon which is pretty straightforward and consists of nothing but rooms of gibdos, keese, and Pol's voices. Some of which have key drops, and one has a key just lying on the ground again.
The boss of level five is Digdogger. He's invincible unless you play the recorder, which causes him to split in smaller versions of himself that can be harmed normally.
He is very easy to beat.
== LEVEL 5 TOTALS ==
Bushes Burned: 0
Walls Bombed: 2(+2)
Blocks Pushed: 5(+3)
Rooms Cleared: 18(+4)
== MISSED ITEMS ==
Map - Behind a locked door
Compass - Requires defeating all the red darknuts in a later room that can otherwise be ignored
Bomb Upgrade - Requires opening a locked door and bombing a wall
== MISSED CLUES ==
"Digdogger hates certain kinds of sound." - Letting you know how to beat the boss of level five. This is found behind a locked door or bombing into the room.
"Secret power is said to be in the arrow." - Either meaning arrows can be used to effectively kill the Pol's voices in this dungeon, or letting you know that Ganon can only be defeated with the silver arrows.
Having finished level five, the player can now make their way directly to level six. Having obtained the recorder, its second use comes into play here. Using it on the overworld causes a tornado to fly in. If it picks up Link, he'll be warped to the entrance of a previously completed dungeon.
Now, level six, like levels one, two, three, four, and five is also completely exposed and once you walk onto the screen with it, you're free to go inside. You won't be able to finish the level without the stepladder, not that you'd particularly want to do this level early on to begin with.
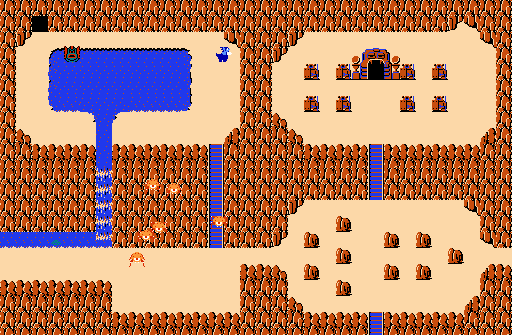
Level six is located in the western half of Hyrule, a secluded area which is cut off from the rest of the map at two different points, to try and keep new players out. The first way there is to use the stepladder to cross the river that's in the area near level five. This can be done immediately after finishing level four.
The second way, is by navigating through the lost woods, a looping screen similar to the mountain climb for level five. Of course, you need to know the solution to this maze to take this route.
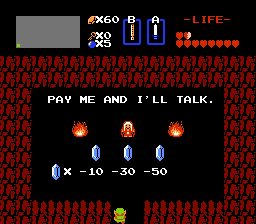
And so once more, the solution is given by an old woman who wants money who is close to the location where that information is useful. The woman is located in an open cave in the southwestern corner of the map, two rooms away from the lost woods.
30 rupees is all it takes to get this solution at any point in the game. So you can clumsily stumble your way into level six very early on. Assuming you can make it past the several lynels in the screens after the lost woods which I believe can one shot a starting player. (For the curious, paying 50 rupees results in the woman just saying "Boy, you're rich!" which is a dick move.)
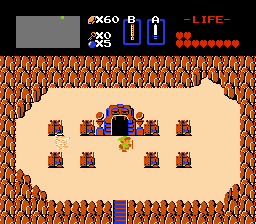
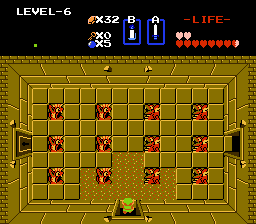
Level six is past the graveyard, which uses whites and grays and looks pretty cool. Level six is a contender for the most difficult level in the game, and I'm not looking forward to doing it with ten hearts instead of effectively twenty-six from the other three heart containers and the blue ring's damage halving properties. This is the level to bring a potion for.
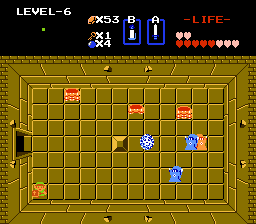
Level 6 - Dragon
A starting split. It's possible to have extra keys from level five if you don't open every door, but do collect enough keys. But I need to head right.
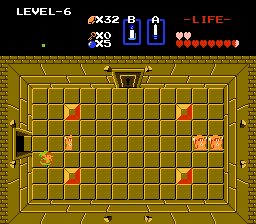
And this level introduces wizzrobes. Horrible teleporting wizards that shoot beams of magic at you. You'll have to defeat all of them to get a key.
Going north however, is just a room with an old man giving advice. If you go in here, and don't have a spare key, you're stuck purchasing one. Boo.
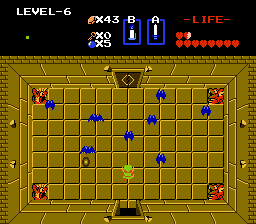
This dungeon start off as a straight line. The first two screens are avoidable combat, but this room is mandatory, and also gives you a key.

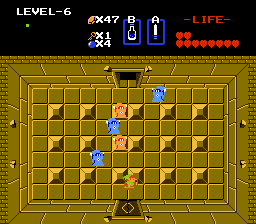
Two screens ahead is another forced fight. This one introduces blue wizzrobes which glide around rapidly including through walls and will shoot at you when they have a shot lined up. Their shots take off 3 hearts and they are terrifying. The general strategy is to stay between tiles as they won't shoot if you're between them, but it's easy to be slightly off center, or have other enemies walk into you while you're dancing around.
After several deaths, I make it through this room and onto the next!
AAAAAAAAAAAAAAAAAAAA
Thankfully I clear this room my first attempt. If only I could try bombing the right wall instead...
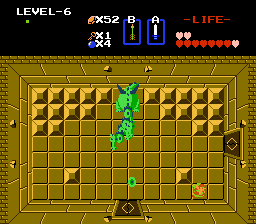
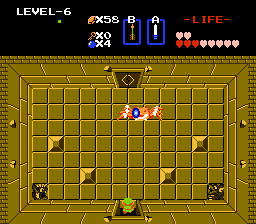
And then another fight with Gleeok, who now has a third head. This triple gauntlet is the sort of thing that makes level six a contender for the most difficult in the game.
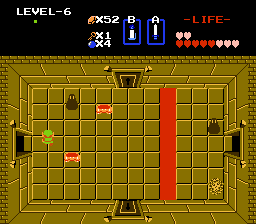
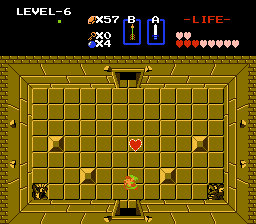
Gleeok is not a wizzrobe at least. The next room is a welcome respite. The eastern path can be explored but won't do me any good. There's an advice room at the end of it, but it involves clearing another room completely to access, and that room has more wizzrobes of both colors.
The north path also has wizzrobes, but more of a purpose as it leads to this dungeon's treasure, the wand, which shoots magic like the wizzrobes do for damage equal to the white sword. It's a very useful item as it's a ranged attack that can be used indefinitely. I have to skip it. Don't worry though, wizzrobes are immune to it so it wouldn't help me out any here.
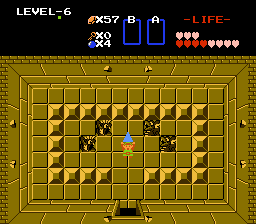
Heading south leads to a room with wizzrobes that can be skipped, and a key on the ground. After that a room with vires which have to be defeated to proceed or head back.
The next room contains yet another forced fight with wizzrobes. Afterwards the block can be pushed to reveal stairs to the rest of the dungeon.
A few more screens, and a single locked door which can be bypassed with that key found out in the open, and you'll find the boss, Gohma.
Gohma dies in a single hit from an arrow, its only weakness. The wizzrobes are the real boss here. Unless you skipped getting the bow way back in level one, then you just have to die and curse Nintendo.
And that's level six! It's awful!
== LEVEL 6 TOTALS ==
Bushes Burned: 0
Walls Bombed: 2
Blocks Pushed: 6(+1)
Rooms Cleared: 25(+7)
== MISSED ITEMS ==
Map - Requires defeating all the enemies in the room after Gleeok (no wizzrobes though!)
Compass - Requires defeating all the zols in one of the first rooms
Wand - Requires another key from a room with red wizzrobes, defeating all the red and blue wizzrobes in the locked room, and pushing a block.
== MISSED CLUES ==
"There are secrets where fairies don't live" - I'm going to have words to say on this very shortly.